
shell6.tdl.com Domain E-mail Administration
|
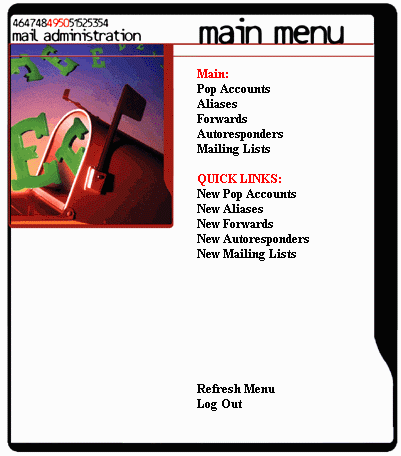
This server allows you to administer e-mail for your own domain, using a simple web-based form. You may not only add aliases and forwards, but you may even add your own mailboxes, complete with a POP3 login and password. Also, depending on your account setup, you may add mailing lists and autoresponders. It is suggested that one of the first things you do is add a main POP3 emailbox besides "postmaster" to use for your personal email.
You will see the following table below. If you have a lower class of account, the mailing list options may not be available.
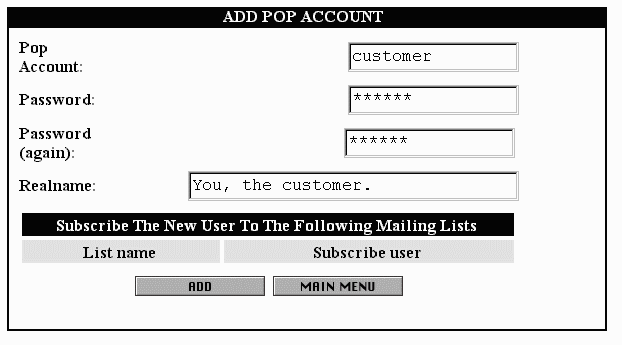
First click the "New POP accounts" link. You will be prompted for a POP account, password, and real name. To guard against errors, you must enter the password twice. The POP account is what will be put into the POP3 Username section in your mailer. Then simply click the Add button, and the new POP account will be added. If you wish, you may add the new POP account to any local mailing lists you have set up with the "New Mailing List" command described below. Note that if you wish to forward mail to your domain to a remote mailbox, creating a virtual POP user will not help. Instead, skip to the Forward section, and follow the instructions there.
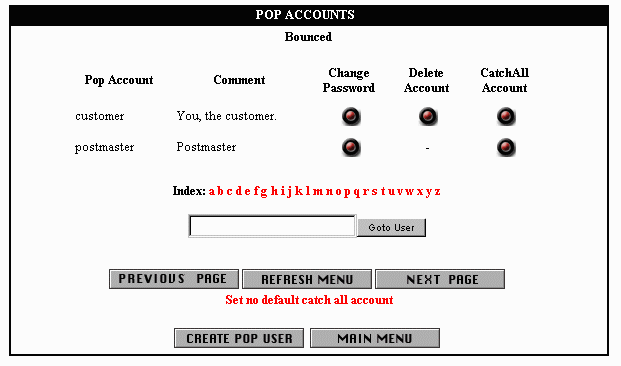
After creating a pop account, view the list of existing POP accounts by clicking on "POP accounts" on the main menu. From here, you may create new accounts, delete accounts, or set an account to ctach all mail not addressed to any existing accounts, aliases, forwards, mailinglists, or autoresponders.
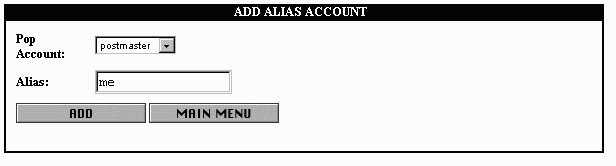
Next, find the row for your new POP account, and look under the "CatchAll Bounced" column, and click the corresponding red and black circle. This will set the mailbox you just created as the default address, where any e-mail to your domain that is not specifically adressed to any of the other addresses will go. Aliases are additional addreses that point at existing POP accounts. To create one, simply click "New Alias", select the account you want a new alias for, and type the name of the new alias. Like the New Pop Account form, you should enter it without the @domain.com. Then click Add to add the new alias. You may wish to make a new alias for Postmaster, and have it be the CatchAll account, instead of creating a new mailbox for personal use, though if you do this, your e-mail user must be postmaster.
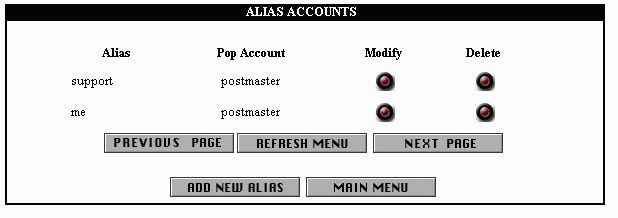
As with POP accounts, clicking the "Aliases" link on the main menu will show you the list of aliases. The "modify" button is used to add and remove additional addresses from your aliases.
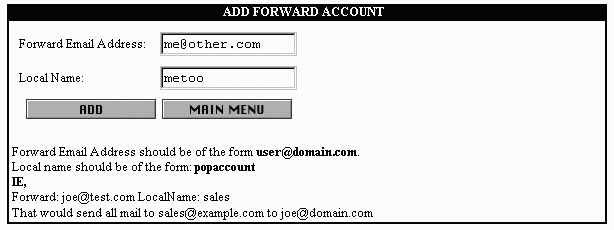
Forwards send email to the designated address@yourdomain.com to the chosen remote address(es). Click "New forward", and fill in the local name, and the forward email address. The proper syntax is explained on the page itself. If you wish to forward the CatchAll account, there is a special procedure for this. Create a temporary CatchAll account, then delete it. It will ask you if you wish to forward. Click the checkbox, and type in the new forwarding address. Then click the "Confirm Delete" button.
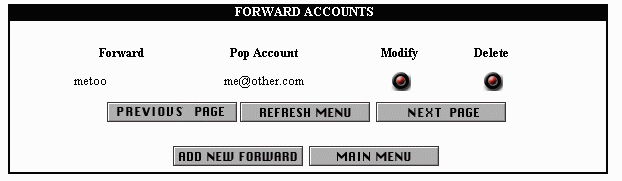
As with other options, you can view the existing forwards by selecting the appropriate link from the main menu.
Note that aliases and forwards are very similar, and forwards can be added to an alias, and aliases can be added to a forward, and both can be added to a pop account, by creating an alias or forward of the same name. If you created it as an alias first, it is listed under aliases. If you created it as a forward first, it is listed under forwards. If you deleted the first forward, and the line below it is an alias, it will be moved to aliases, and vice versa for deleting an alias when it was created first. Autoresponders automatically send back a text mesage when mailed to. Click the New Autoresponders link, and you will see the autoresponder form. The Autoresponder name is, once again, the e-mail address, minus the @ and the domain. The Owner Email address is the person who owns the autorepsonder, and Subject is the subject line of the automatically sent e-mail. Simply type the text you want sent into the large textbox, and then click Add. If you wish to use the autoresponder feature as a vacation replacement, you may create an autoresponder called "vacation" and alias your existing account to a new temporary account created for holding mail received while you are away, and add a forward to the alias you just made to the vacation autoresponder. When you return, delete the alias and theforward, and change your username and passwod in your mail software to read the mail in your temporary account. With some mail programs, you may create different profiles or personalities, so you don't have to lose your old settings. If you wish to put the catchall account on vacation, it's even easier. Simply create an autoresponder called "default" that sends back the vacation message, and delete it when you get back. click here for sample (this one is large) The autoresponders also have their own listing on a seperate page.
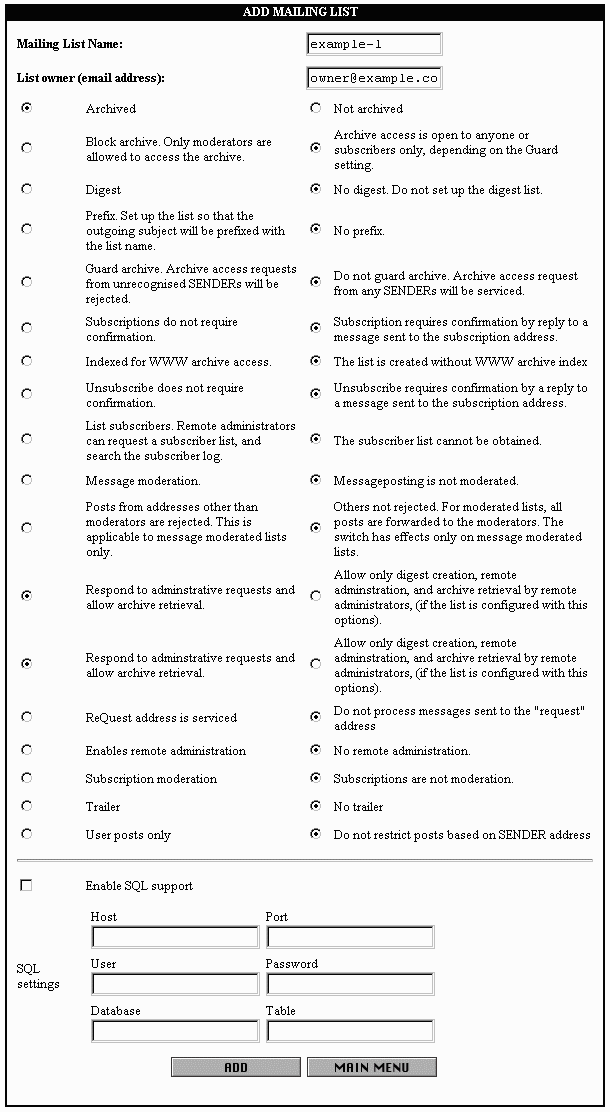
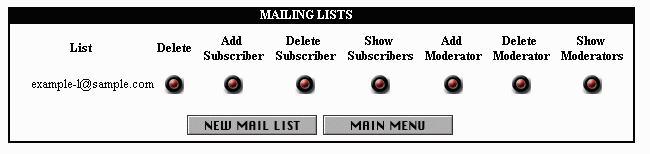
To create a mailing list, or listserve, click the New Mailing List link, and enter the mailing list name and owner, click Add. An example mailing list name would be "example-l". This will create the mailing list, and also create all the other standard aliases for an EZMLM mailing list. For our example mailing list, example-l-subscribe@example.com, example-l-unsubscribe@example.com, and some other addresses will be created. Users will be able to subscribe via the subscrbe alias, and you can manually edit the mailing list by clicking the coresponding delete and add buttons for each mailing list you run. Note that there are now a lot of options that can be configured on mailing list creation. You may safely leave them alone if you don't understand them.
The mailing list section of the control panel looks like this.
The yellow and grey butons that are in a row and column perform the function in the column for the account/list/alias in the specified row. For example, the button in the "Show Subscribers" column in the "example-l@example.com" row will show the subscribers of the example-l@example.com mailing list. For further information on EZMLM list administration, please examine the EZMLM FAQ. |
